Object detection on Android has evolved significantly over the years, and with the advent of powerful machine learning models and improved hardware capabilities, developers now have access to advanced techniques for building robust object detection applications.
This blog is associated with object detection and the use of TensorFlow, TensorFlow Lite (CPU & GPU), and ML Kit on Android devices. It facilitates us in detecting, locating, and monitoring an object from a photo or a video along with real-time item detection.
What is Object Detection?
Object detection is a computer vision task that involves identifying and locating objects within an image or video frame.
Unlike image classification, where the goal is to assign a label to an entire image, object detection goes a step further by identifying and delineating the specific objects present in the visual data.
This technology plays a crucial role in various applications, ranging from autonomous vehicles and surveillance systems to augmented reality and image search.
What is TensorFlow?
TensorFlow is an open-source end-to-end platform for creating Machine Learning applications. It is a symbolic math library that uses dataflow and differentiable programming to perform various tasks focused on the training and inference of deep neural networks. By using it we can create machine learning applications using various tools, libraries, and community resources.
What is TensorFlow Lite?
TensorFlow Lite is TensorFlow’s lightweight solution for mobile and embedded devices. It let you run machine-learned models on mobile devices with low latency, so you can take advantage of them to perform classification, regression, and other things.
What is an ML Kit?
ML Kit is a cross-platform mobile SDK used to implement ML techniques in mobile applications by bringing Google's ML technologies, such as the Mobile Vision, and TensorFlow Lite, together in a single SDK. It offers both on-device and cloud-based APIs.
Three Approaches we are going to use for Object Detection:
TensorFlow Object Detection:
The TensorFlow object detection API is a framework for creating a deep learning network that solves object detection problems. We will use the protobuf model (.pb) TensorFlow model for the same.
TensorFlow Lite Object Detection:
TensorFlow Lite is an open-source deep learning framework to run TensorFlow models on-device. We can detect objects from camera feeds with MobileNet models.
ML Kit Object Detection API:
With ML Kit's on-device Object Detection and Tracking API, you can detect and track objects in an image or live camera feed.
How to use the Camera of an Android Device?
First of all, we need to add camera and internet permissions in the AndroidManifest.xml file along with uses-feature.
For all three concepts we will use the CameraX library of Android.
Uses-case based approach of CameraX:
Preview: To get the real-time image on the display.
Image Analysis: You will get frame by frame luminosity of the image. It will help you send the data to ML Kit for machine learning and related image analysis tools, such as object detection.
Image capture: You can capture the image in high quality and save it.
For using CameraX in Android applications you need to add the following dependency in build.gradle (Module: app)
3.Now we create a function that takes bitmap as an input and stores the result of the model into the output array.
Here, a bitmap is converted from frames that are extracted from live camera feed or static video.
privatevoidrunTensorFlowOnBitmap(Bitmap bitmap) {
byte[] pixels = getBytes(bitmap);
// Copy the input data into TensorFlow.
inferenceInterface.feed(INPUT_NODE, pixels, INPUT_SIZE);
// Run the inference call.
inferenceInterface.run(OUTPUT_NODES);
// Copy the output Tensor back into the output array.// result is the array which stores output
inferenceInterface.fetch(OUTPUT_NODE, result);
}
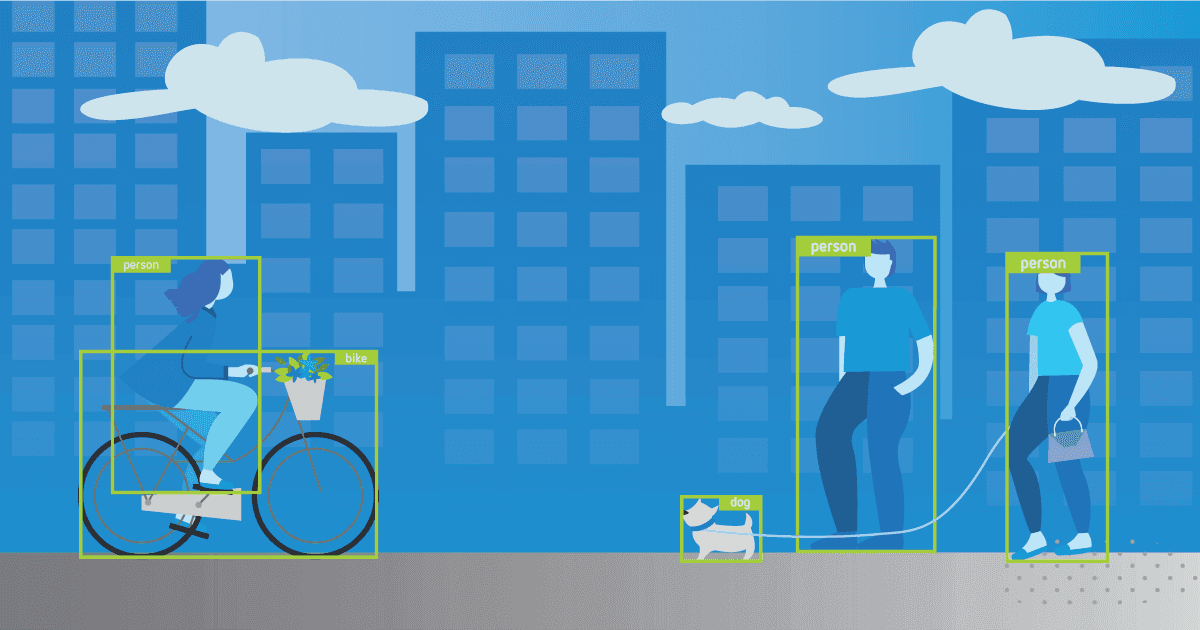
So this output array contains all the detected objects from a particular image which can be used to draw boxes over the detected object. To draw, utilise the Canvas class from the android.graphics package, which creates a rectangle on the overlay layout using coordinates for exact positioning.
Result:
Object Detection using TensorFlow Lite :
Why use TensorFlow Lite?
Applications developed on TensorFlow Lite will have better performance and less binary file size than TensorFlow mobile.TensorFlow Lite models have faster inference time and require less processing power, which provides faster performance in real-time applications.
TensorFlow Lite supports lots of hardware accelerators such as CPU, GPU, NNAPI.
There are two ways we can detect Objects using TensorFlow Lite:
TensorFLow Lite CPU
TensorFlow Lite GPU Delegate
For using TensorFlow Lite in Android applications you need to add the following dependencies inbuild.gradle (Module: app)
Here, variable MODEL_FILE contains the **.tflite ** model name.
Now we create a function to run object detection on a particular image. For that first we need to convert the Bitmap image to TensorImage and then call the detect() method of ObjectDetector for detecting objects.
privatevoidrunObjectDetection(Bitmap bitmap) {
//Create TFLite's TensorImage objectTensorImageimage= TensorImage.fromBitmap(bitmap);
// Feed given image to the detector
List<Detection> results = detector.detect(image);
if (!results.isEmpty()) {
//results list contain list of detected objects
Log.e(TAG,"Objects = " + results);
}
}
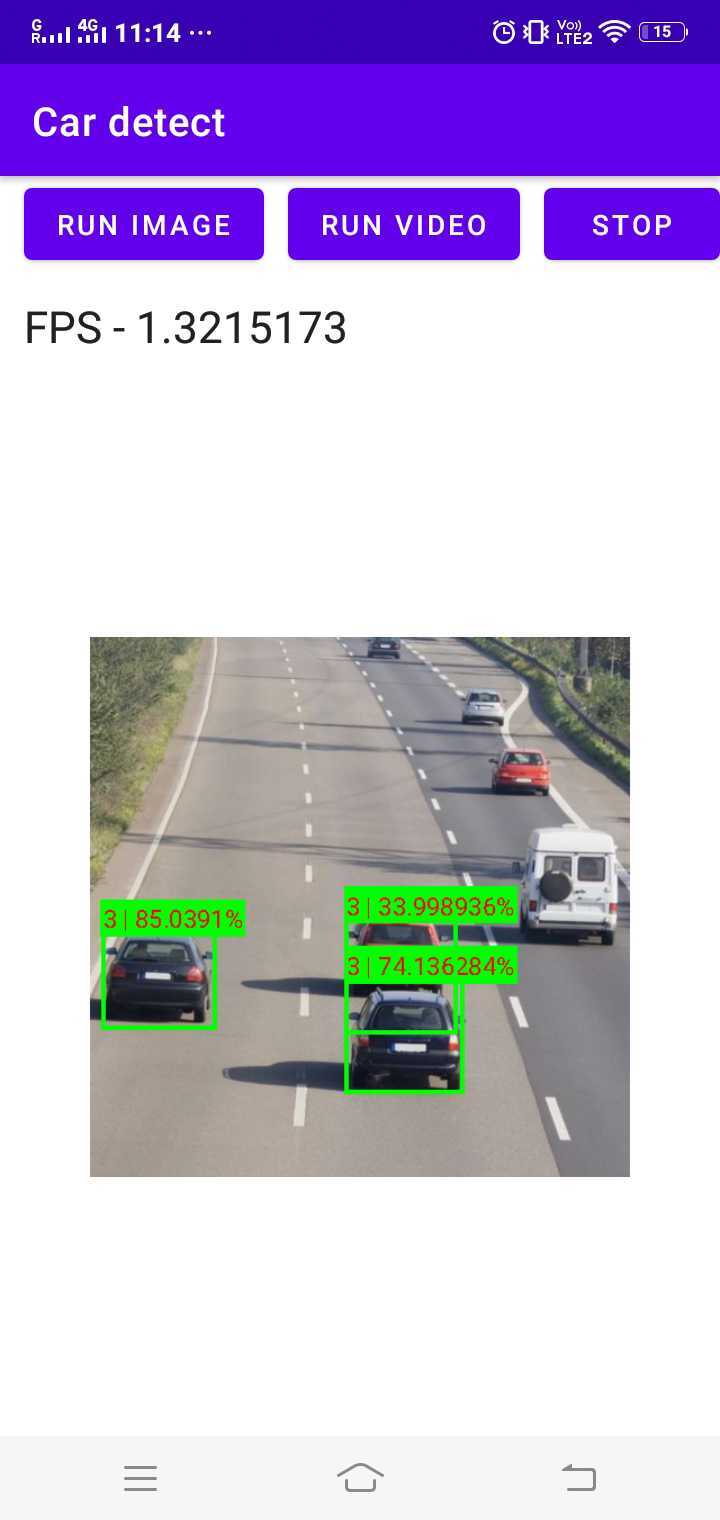
Here, the results list contains all the detected objects from a particular image which can be used to draw boxes over the detected object using the Canvas class.
Result:
TensorFlow Lite on GPU
There are many advantages of using GPU acceleration such as:
Speed - GPUs are designed to have high throughput for massively parallelizable workloads.
Accuracy - GPUs perform computation with 16-bit or 32-bit floating point numbers and (unlike the CPUs) do not require quantization for optimal performance.
Energy efficiency - A GPU carries out computations in a very efficient and optimized way, consuming less power and generating less heat than the same task run on a CPU.
Now, we will learn about how to use the GPU backend using the TensorFlow Lite delegate APIs on Android.
Steps for GPU Implementation:
First, we need to create an instance of the Interpreter class, which is responsible for object detection.
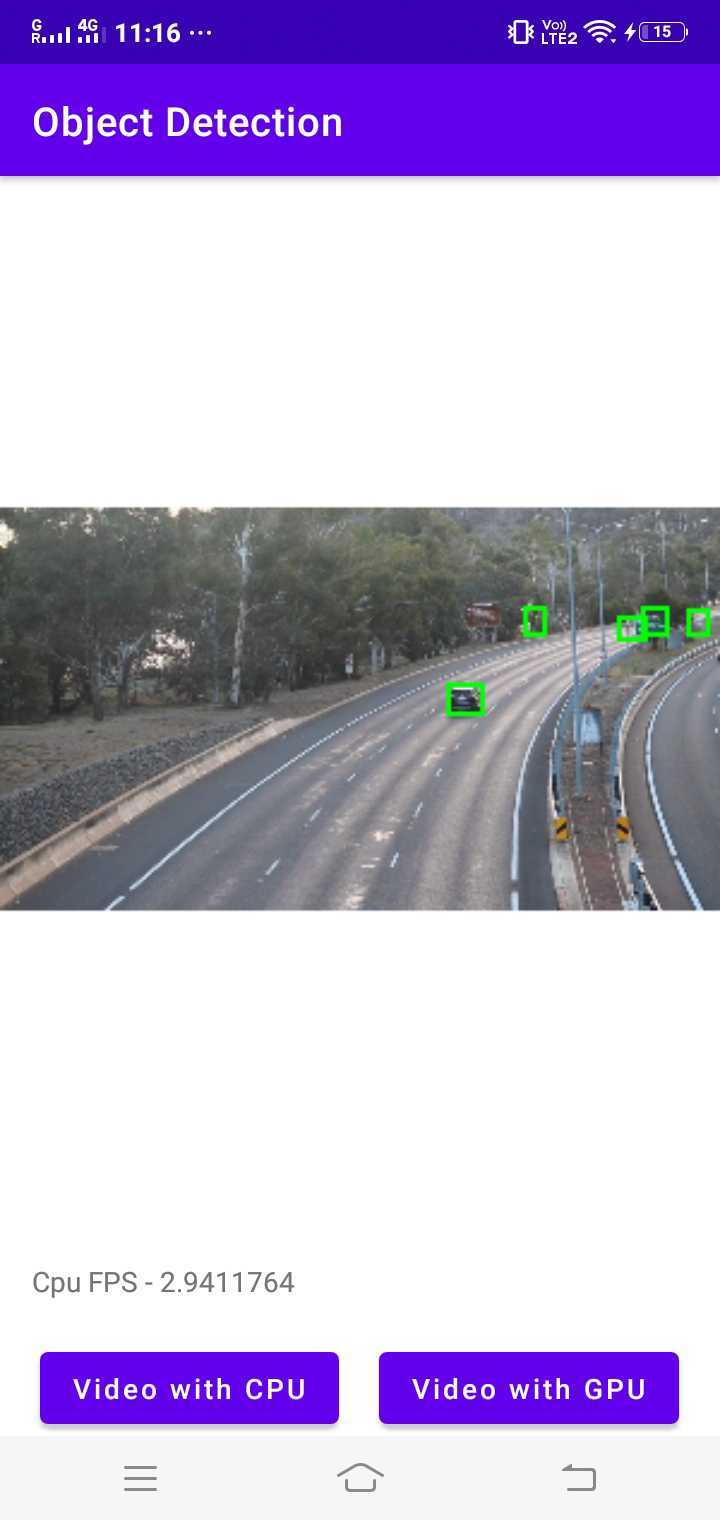
Draw the bounding boxes on the bitmap with the coordinates we got from the results, we can also display the object names which are defined as classes in the output array.
Result:
Object Detection using ML Kit :
ML Kit is a part of Google’s Vision APIs, which has widely used ML models including Object detection. You can directly use ML kit’s default model for object detection as described here or use your custom tflite model, which we are going to implement here.
Add the following dependency in build.gradle (Module: app)
dependencies{
  ...
  // mlkit object detection
  // using custom model
  implementation 'com.google.mlkit:object-detection-custom:16.3.3'
  ...
}
Steps to Configure ML Kit in Android:
Configure the Object Detector
private ObjectDetector objectDetector;
LocalModellocalModel=newLocalModel.Builder()
.setAssetFilePath(MODEL_FILE)
.build();
privatevoidinitializeObjectDetector(LocalModel localModel) {
CustomObjectDetectorOptionsoptions=newCustomObjectDetectorOptions.Builder(localModel)
.setDetectorMode(CustomObjectDetectorOptions.STREAM_MODE) //Detecting object from live camera feed
.enableClassification() // Optional
.setClassificationConfidenceThreshold(0.5f)
.setMaxPerObjectLabelCount(3)
.build();
objectDetector = ObjectDetection.getClient(options);
}
Here, MODEL_FILE contains the custom model name stored in the assets folder.
Now to detect an object we need to pass an image to the ObjectDetector instance’s process( ) method.
If the process() method succeeds, a list of DetectedObjects is passed to the success listener.
Here, each detected object contains the following properties :
Bounding box - A Rect that provides a position of the object in the image.
Tracking ID - An integer that identifies the object across images. Null in SINGLE_IMAGE_MODE.
Labels - It contains label description, label index, label confidence.
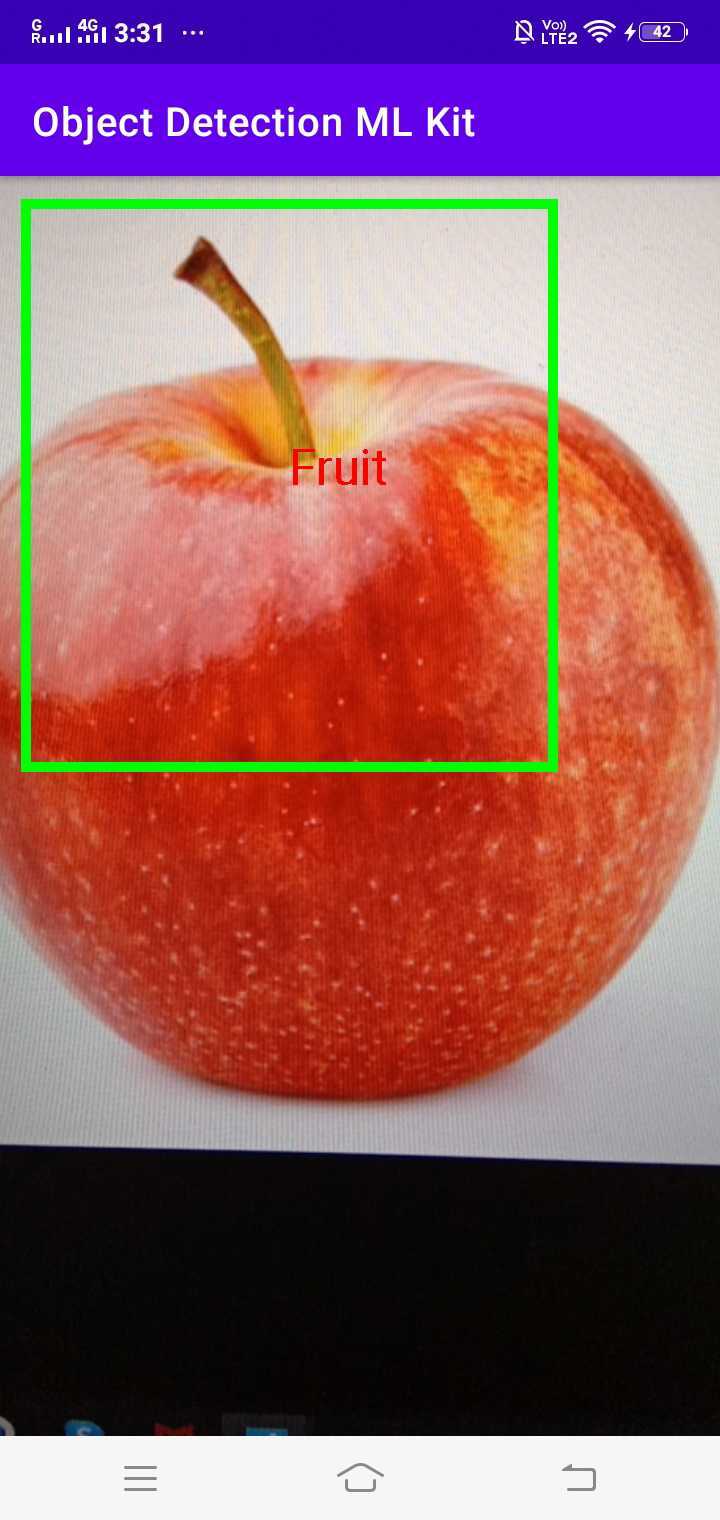
To sum up, these properties help to label every object and to draw bounding boxes over the detected objects.
Result:
And that’s about it! These are the ways we can implement Object Detection on Android mobile devices using three different ML libraries: TensorFlow, TensorFlow Lite, and ML Kit.
Conclusion
Object detection on Android has reached new heights with the availability of powerful frameworks like TensorFlow and ML Kit. Whether developers prioritize customization, model size, or ease of integration, there is a suitable solution for every use case.
TensorFlow Object Detection provides the flexibility of building and fine-tuning custom models, making it ideal for applications with specific requirements.
TensorFlow Lite Object Detection focuses on efficient on-device processing, making it well-suited for resource-constrained environments.
ML Kit Object Detection API strikes a balance between simplicity and functionality, offering an easy-to-use solution for developers who want to implement object detection without diving into the complexities of model training.
Ultimately, the choice between these frameworks depends on the specific needs of the Android application, including considerations such as model size, speed, customization requirements, and integration complexity.
As the field of object detection continues to evolve, these frameworks will likely see further enhancements, providing developers with even more tools to create innovative and intelligent applications for Android devices.
Node.js has emerged as one of the most popular platforms for building scalable and efficient applications, particularly for backend development.
With its event-driven, non-blocking I/O model,...
Restaurant mobile app development has become a key factor in the success of the food industry. By simplifying ordering systems and enhancing customer loyalty, mobile...
The food delivery industry is booming, and with platforms like Uber Eats revolutionising how people enjoy their meals, it’s no wonder businesses are eager to...